Button machines are a popular tool for manufacturers or large groups who need
to create large batches of buttons. There's a simpler way to make pinback
buttons whether you are making them for your home or small groups. You can
create buttons with any slogan, picture , or design, and even reuse the pin back
and front and change out your design.
Step 1
Create the artwork for your button. Print the design on your computer, or
draw it yourself using markers. Make sure that your artwork is exactly the same
size and shape as the casing of the button.
Step 2
Open the snap-in switch. It usually has a back with an opening that allows
for the pin as well as a transparent plastic front. The casings for buttons can
be bought at craft stores or from online stores. Below is a link which will
direct you to other information.
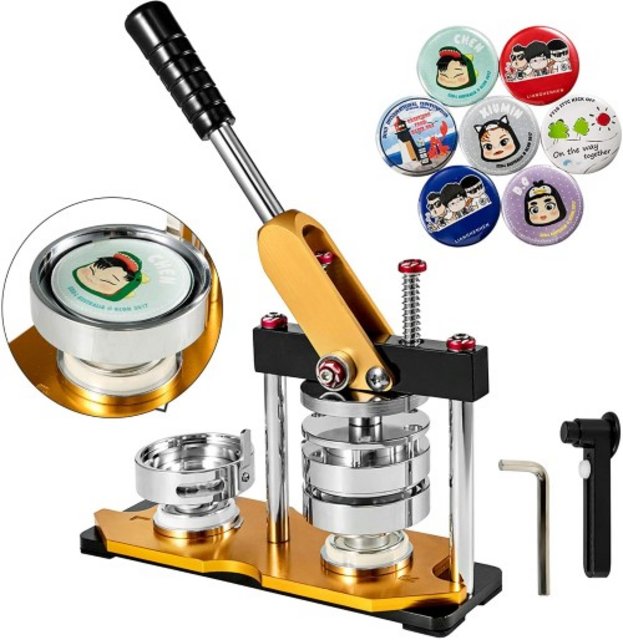
Step 3.
Place your artwork inside the button
maker. Then, ensure that the button fits snugly against the plastic face.
Finally, attach the backing to the pin.
Step 4
If necessary, insert the pin into the back. The pin back could already be
assembled. If not, you simply have to insert the supplied pin into the opening
in the rear of the casing for the pin.
You can make an e-pinback button with no button machine
Pinback buttons, also called pin badges and pin-ons, are typically created
without the use of a button machine. For fundraising, campaigns and marketing,
imaginative individuals and groups typically create pinback buttons with no buttonholes machine. They
can also be utilized to create brooches, gifts, reflect their opinions, and
other projects that are fun. You can make the buttons from recycled materials
like cardboard, fabric and even old pins, as well as things from the craft store
like decoupage glue and safety pins. It is important to think about your
schedule and your available time. For example it is possible to create pinback
buttons right away with what you have at home while your group would like to
make them in bulk after gathering the materials.
Gather Pinback Button Faces
Bottle Caps: These metal caps can be used to create small pin badges. They
measure approximately 1-inch in diameter. If they've retained unpleasant odors,
soak in warm water with dish soap overnight and then air dry. It is possible to
paint the caps of your bottles with silver even though you'll be designing the
front. Spray painting them with silver will help the bottle caps look more
attractive on an outfit or backpack. Spray painting them can be a good idea if
you're giving them away as gifts or selling them for sale. If you do, spray the
inside so the rims around the area you're painting match the backs.
You can find unused pin badges here.
Corrugated Cardboard Create a template disc the size you would like your pins
to be to be, use it to draw the number of pins you wish to make. Use scissors to
cut out.
Craft stores sell wooden geometric shapes made of wood such as discs and
hearts.
Design the Pinback Buttons
Create on the Computer
You can create your pin design using photo editing software.
Choose the photos and other images that you would like to use. You can save
them to your computer and alter the size of the images to match the button's
design.
Make a background that mirrors the shape and size of the part of the pin
where you will attach your picture.
Add elements such as text, a photograph, art designs, etc. Then arrange them
in a manner that is logical.
It can be enjoyable to make your own pin with a collage style rather than one
image with text.
For this purpose it is possible to load your printer with normal printer paper. Photo paper is not required. Print, and let ink dry before placing or stacking.
Коментарі
Дописати коментар